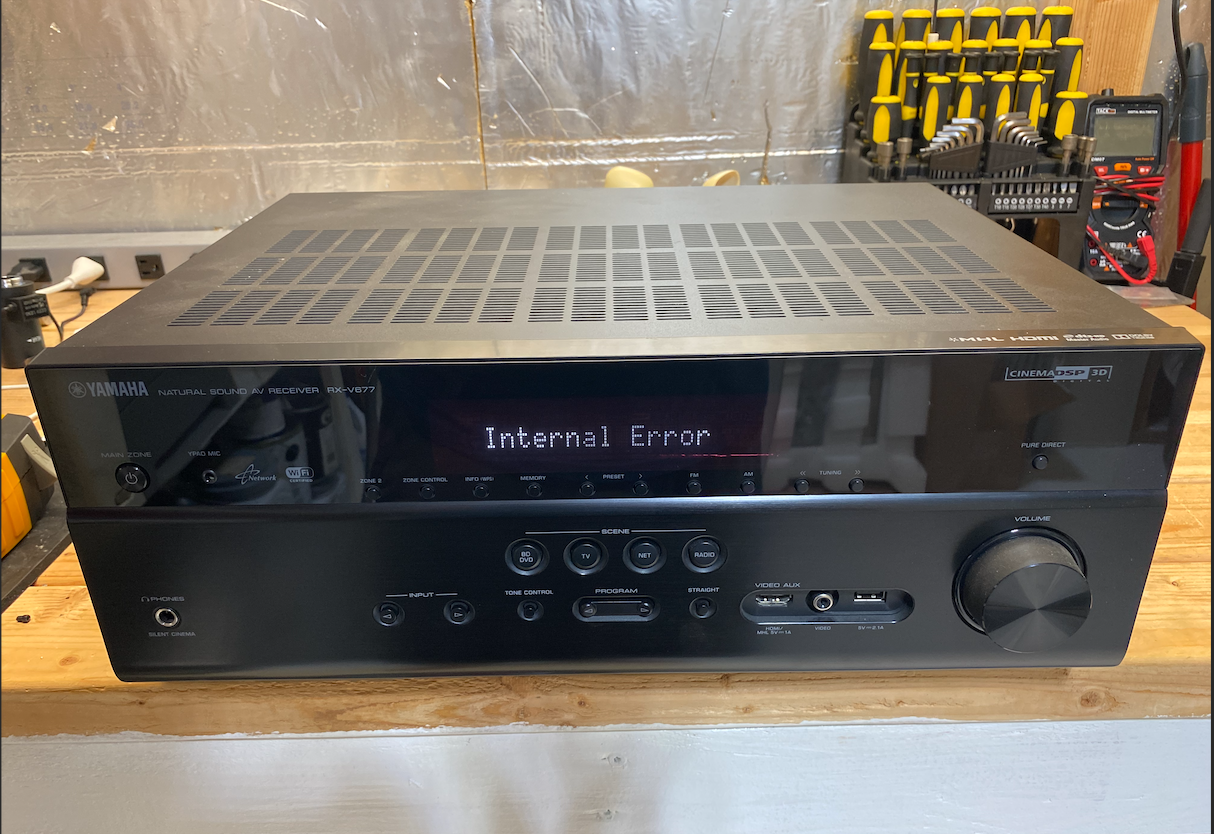
During the last thunderstorm, my home lost power, and despite having as much power protection as possible, my Yamaha home theater receiver suffered some damage. Thankfully, it's easy to fix and works for other Yamaha home theater receivers in the same class. The symptoms are upon powering on, no function, and the display shows Internal Error
Let's fix it!
Step 1:
Disconnect the power cable from the outlet, and disconnect everything, including any HDMI and speaker connections. Move the Reciever somewhere you can work on it efficiently.
Step 2:
Remove the nine screws holding the top cover on.
- 2 screws on each side (4 total)
- 5 screws in the back
Slide the back cover off and set it aside.
Step 3:
These
Locate the section of the top circuit board with the small Molex connector and specifically the three chips to the right of the Molex connector.
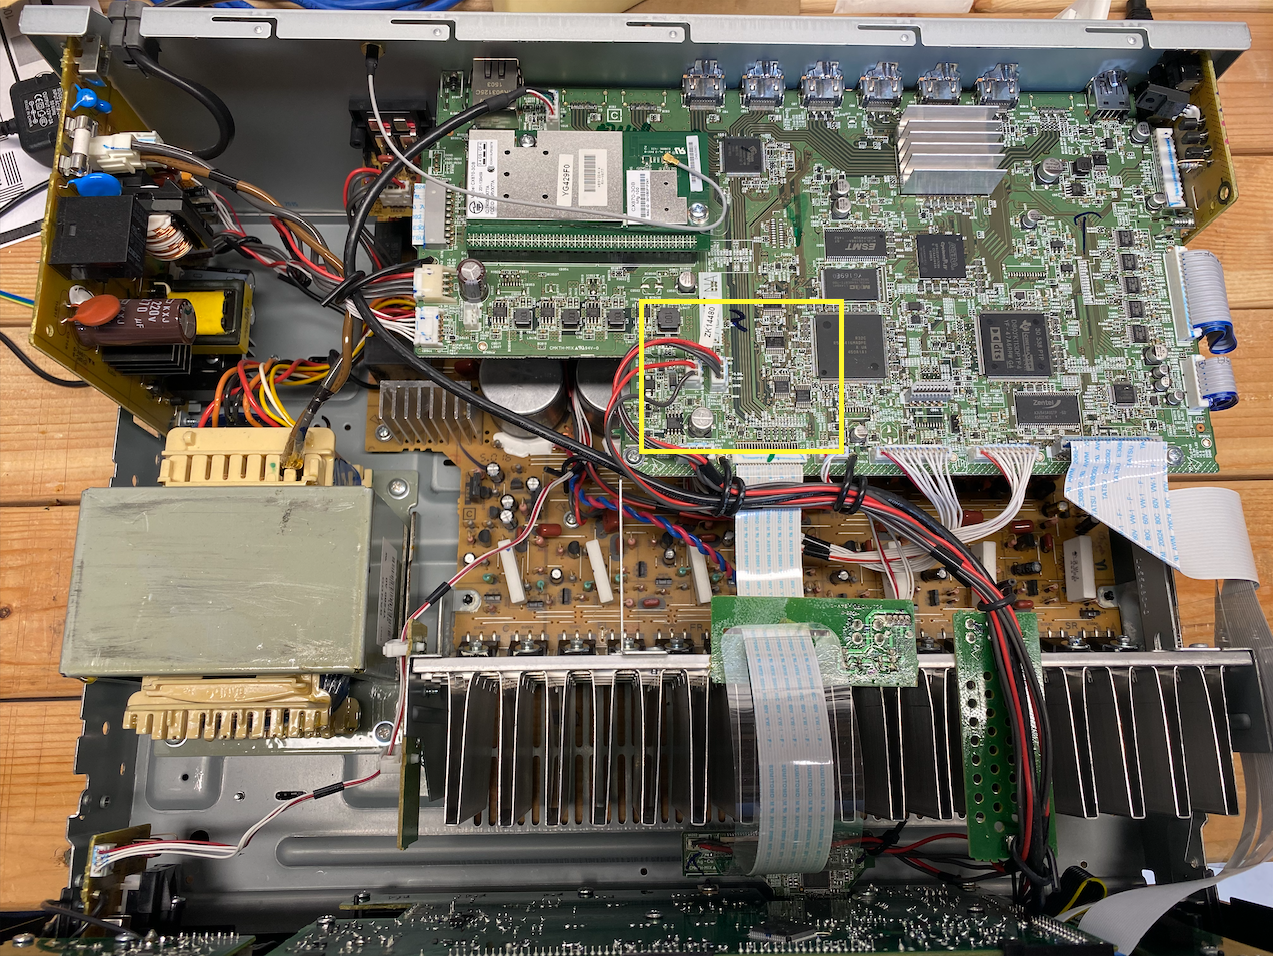
Look closely, and find the two solder pads identified with R896 - These are what we're looking for.
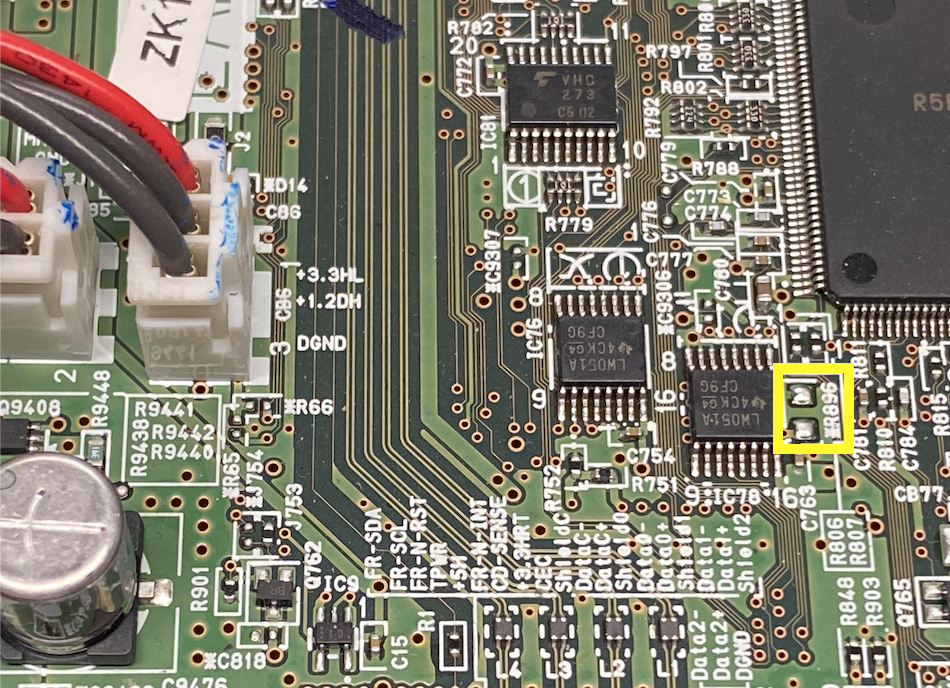
A little closer view:

Step 3:
We need to short these two solder pads together while applying power to the receiver. Use a paperclip or a conductive material to connect the two pads, then plug in your receiver. Be careful not to touch the Power Supply circuit board duringdisappear, indicating that the model setting has been this.
Step 4:
You should see No Model Info appear on the screen. If you see this, you can release the two solder pads. Nice work!
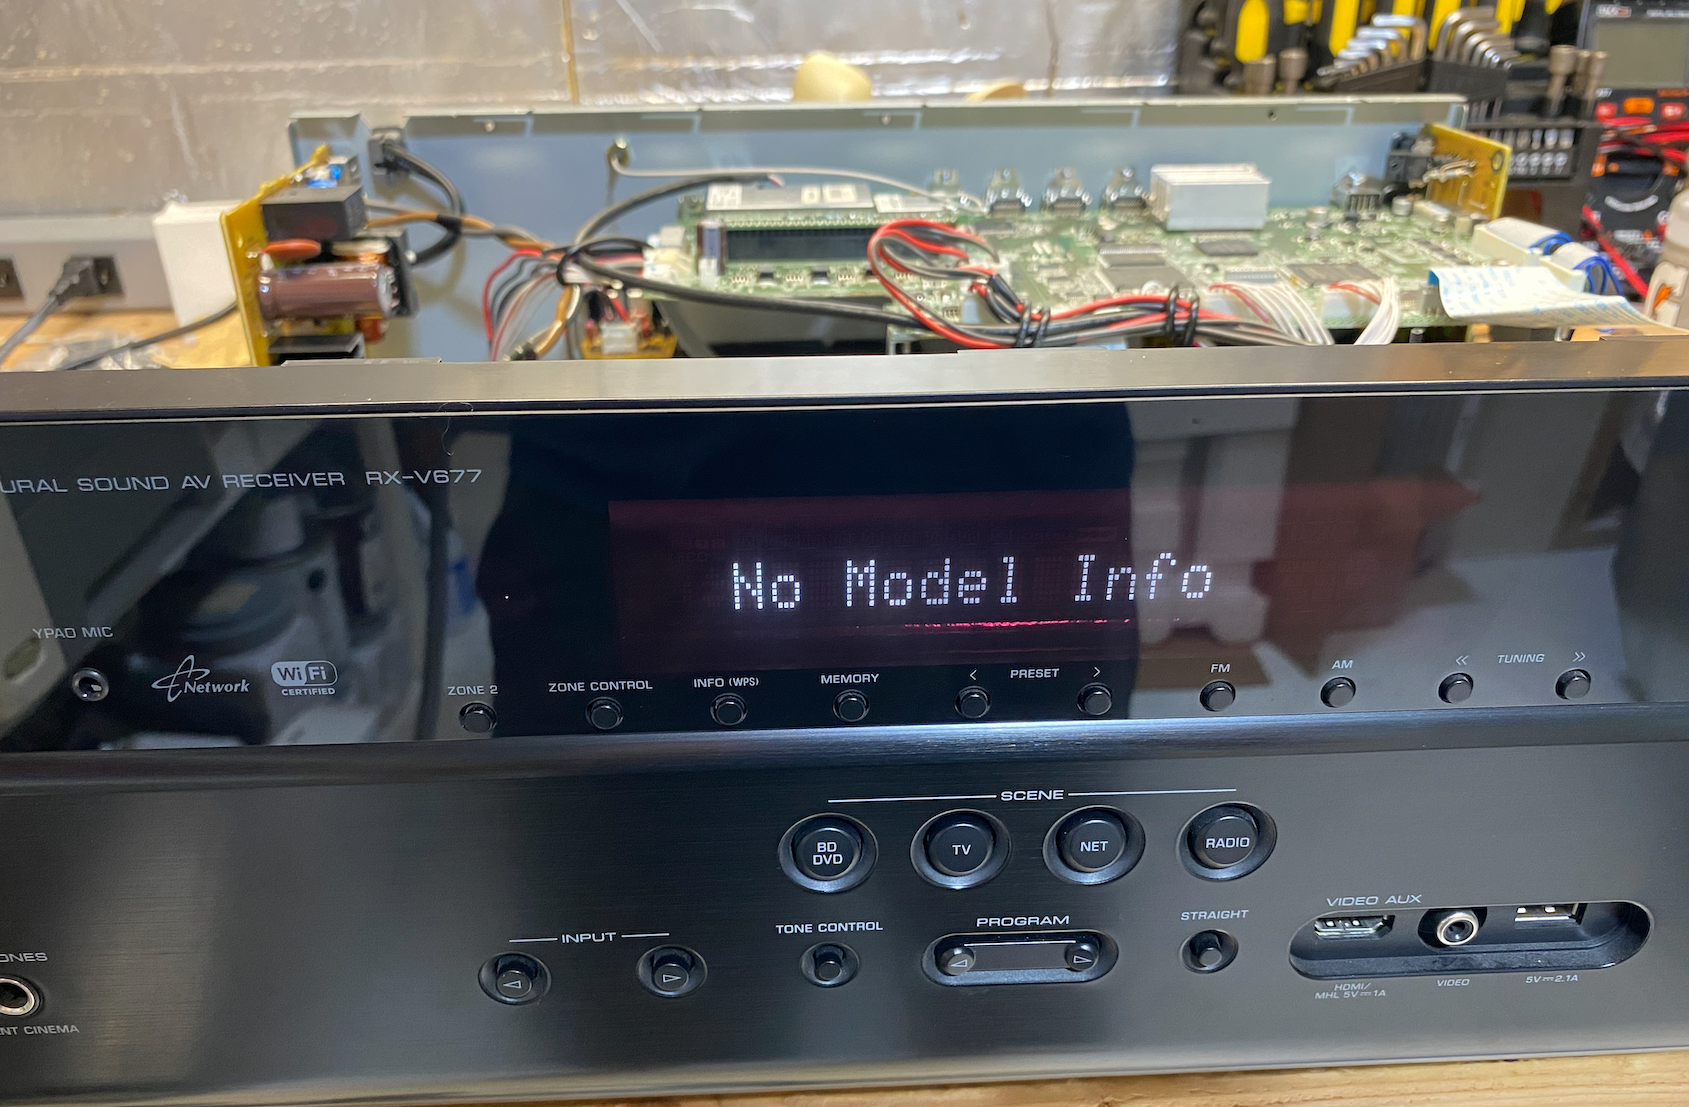
Use the Input buttons to scroll through different Yamaha Reciever models until you find your correct model. Mine is the RX-V677.
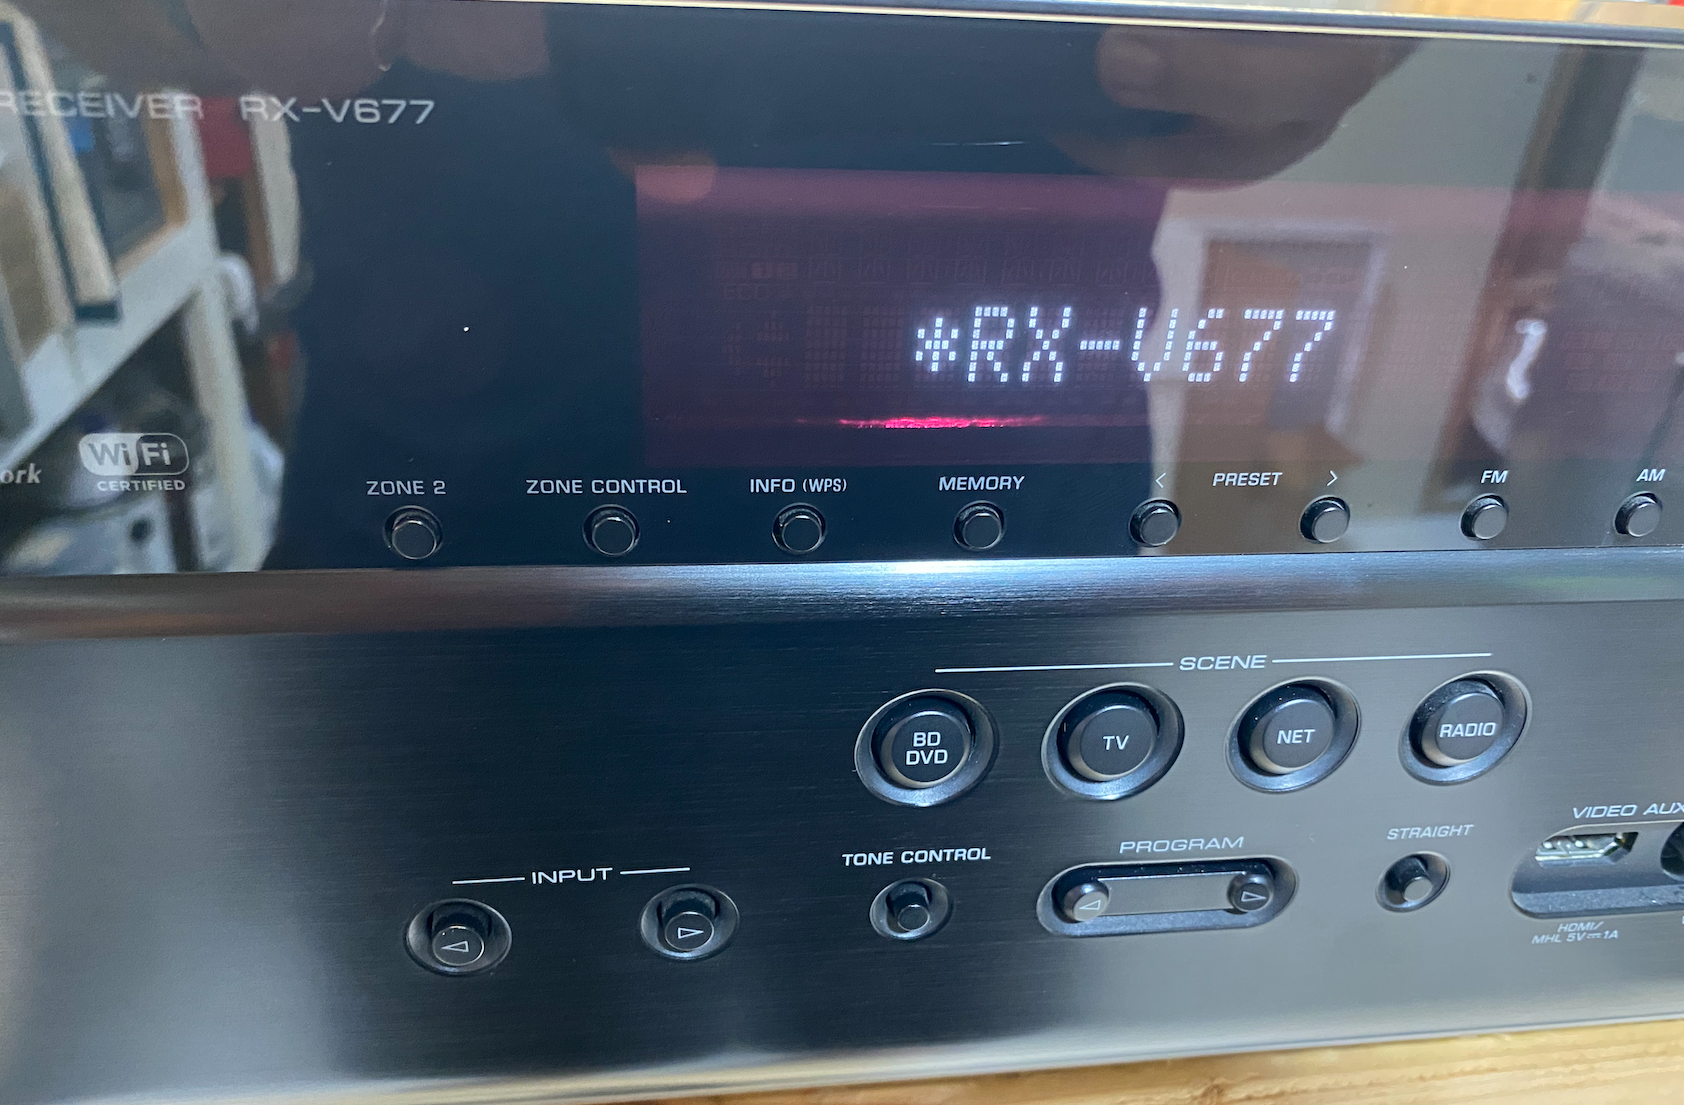
Note the asterisk. Once you have found your model, press the Straight button to confirm. You will see the asterisk disappear, indicating that the model setting has been saved.
Step 5:
Power on your receiver and test! It should turn back on normally!
Step 6:
Place the cover back on the receiver and replace the screws.
Finished!
I hope this guide helps someone from buying a new Home Theater Receiver!
Flashing Red light with no Power?
Another common issue with Yamaha's AV Home Theater Receiver line occurs when you power it on: the red light flashes briefly before turning off, leaving the receiver inoperable. This situation is known as "Protect Mode." This issue often arises temporarily due to a surge or incorrect speaker connections.
If one day everything was fine and the next day it wasn't turning on and flashing the red light, chances are, you just need to deactivate it.
To deactivate Protect Mode, follow these steps:
- Power Down & Unplug: Turn off the unit and unplug the power cord from the wall for 10-30 minutes to clear any temporary glitches.
- Disconnect Everything: Unplug all speakers and other connected devices.
- Inspect Speaker Wires: Check for frayed wires, loose connections, or wires touching each other or the receiver's chassis (this causes shorts).
- Check Ventilation: Ensure vents are clear of dust and obstructions to prevent overheating.
- Next, try these button sequences while applying power (some models vary):
- For many RX-V/RX-A models: Hold Tone Control and STRAIGHT buttons, then press Power, and continue holding the buttons for a few seconds.
- For RX-V385: Hold STRAIGHT and SCENE buttons while powering on.
- Finished! If all is well, the Receiver will power back up as normal.
If it doesn't power back up and stays in Protect Mode, then we have a deeper issue that will require some troubleshooting. At this point, the receiver is detecting a fault condition and intentionally preventing itself from powering on to avoid further damage.
The most common causes are:
- Shorted or failed output transistors
- A fault in the power supply section
- Shorted speaker outputs or damaged internal wiring
You will want to check each transistor on the amplifier channels as well as components in the power supply section.
Tools You'll Need
- Digital Multimeter - I use the Fluke 117, but any reliable meter with diode and resistance testing will work
- Soldering Iron (temperature-controlled is best)
- Solder wick or a desoldering pump
- Small screwdrivers and nut drivers
- Isopropyl alcohol and a soft brush (for cleanup)
Safety First
Before you begin:
- Unplug the receiver and let it sit for at least 30 minutes
- Large capacitors can hold a charge - discharge them safely before probing
- Never power the unit while measuring resistance or diode values
Danger! Make sure to stay clear of the power supply and any of the capacitors used in the amplifier circuit! They may still have energy stored in them and can shock you. Discharge them before working on them. Be smart, and I'm not responsible if you injure yourself or further damage your receiver.
Step 1: Eliminate External Causes
Before opening the receiver:
- Disconnect all speakers and inputs
- Try powering it on with nothing connected
If it still goes straight into Protect Mode, the fault is internal.
Step 2: Visual Inspection
Once the cover is removed:
- Look for burned resistors, cracked components, or discoloration
- Check for bulging or leaking capacitors
- Inspect solder joints around significant components and heat-sinks
Yamaha boards are generally well-built, but heat cycling can cause cracked joints over time.
Step 3: Checking Output Transistors
This is the most common failure point.
- Set your multimeter to diode test
- Test each output transistor (usually mounted to a large heat sink)
- Compare readings across identical channels
A bad transistor will often show:
- A short between collector and emitter
- Zero or near-zero resistance where there shouldn't be any
If one channel reads differently than the others, you've likely found the issue.
Step 4: Power Supply Checks
If the output stages look good:
- Check rectifier diodes for shorts
- Measure resistance across the main filter capacitors (with power disconnected)
- Inspect voltage regulators and nearby resistors
A failed power supply component can also trigger Protect Mode immediately at startup.
Step 5: Replace and Re-test
When replacing components:
- Use exact or approved equivalent parts
- Replace thermal paste on transistors mounted to heat sinks
- Double-check orientation before soldering
After reassembly:
- Power on with no speakers connected
- If it stays on, reconnect speakers one channel at a time